How exciting! Effectively there is no set way to go about buying your fireplace but we do have a few helpful steps;
What have you got?
For us to better understand what we can do for you it’s ideal for us know what is there already. Sending an image to us certainly gets us in the right direction. THE most important piece of information we need to know where existing chimney flues are concerned; is your chamber size. Your chamber is the space behind the fireplace, otherwise known as your “Builder’s Opening” (the space where the fire sits), its size can be approximated from your property’s age. There are two ways we can get an insight to what you have; the first is a simple image of your fireplace (this is ideal for us knowing how much there is to take out, if we are removing the fireplace) the second is a survey visit. We offer a free of charge, non committal survey visits to understand what we can do for you.
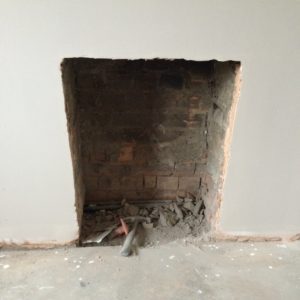
Adjacent is an image of an already ripped out fireplace exposing the chamber behind.
Notice the concrete lintel at the top of the Chamber. The Lintel is the key component holding the brickwork above intact. It’s not advised to cut into the Builder’s Opening, doing so can have cause major structural damage.
It is possible to explore the possibilities of re-engineering the Chamber to suit a bigger fire, however this should be discussed with a Builder and Flue Specialist.
What are you looking for?
It’s useful to understand what specifications you’re looking for. The best way to move forward is ask yourself what is the most important aspect you want to get from your fireplace. Personally we recommend looking closely at the ‘Fire’ itself. Some chose their fire purely on the looks, not having any concern on its heat efficiency. Others are the opposite, some are all about the heat and how far their fireplace can stand as the main independent heat source. If looks are what you’re after consider what style you’re looking for; Traditional or Modern. Further to this do consider how you’ll fuel your fireplace; Gas or Solid Fuel.
Some clients are more interested in just having a ‘Surround’ they want, or not want at all in some cases.
Effectively it is as simple as really thinking “What do I want most of all?” the rest falls into place very neatly. If that question is too big to answer that’s OK, believe us when we say we know how big a selection there is to choose from. We’re here to help you guide you in the wide world of fireplaces so if you’re unsure what you’re looking for, come in and see us.
Step 1
We welcome you at whatever stage you’re at to come into our showroom. Whether you’re positive you know what you’re looking for or if you’re looking to see what’s out there in the world. If you’re armed with an image of your fireplace as mentioned above we can be of much better help knowing what you have/what we can do. This is not essential to get an idea as we always find this out with a quick email or site visit.
Once in store we can show off all there is we can do using our display models, brochures and go through all the steps and explain details not always clear online.
Step 2
Once you have a better idea of what you’re looking to have it’s time to get an idea of cost. We can generate a quote with a full breakdown of the goods and works proposed in the quote. We highly recommend having a read through our ‘Terms and Conditions‘ just to make sure you’re happy with everything involved.
Step 3
The fun part! If you’re happy with the quote, the intended works and approximate lead time it’s time to get a date in the diary. Where existing Chimneys are being reused we require the chimney be swept prior to the date of installation for Gas Safe/HETAS regulations. Once a date is all set up it’s then a case of coming on the day and installing the fireplace.
–
Fireplace Installation
Step 1 – Your Fireplace
It’s always ideal for us to understand what you currently have. Whether it’s a full fireplace, outset gas heater or a ready open chamber. From here we can calculate how much needs to be removed to give a more accurate quote for what’s involved.
Step 2 – Rip Out
Here’s the messy part. Whatever is there, sometimes it all needs to come out. Our installers always aim to be as clean and tidy as possible, however there there is always an element of mess.
Step 3 – Installation
Once the chamber has been exposed we can install the full fireplace. First the Hearth goes down, in the case of a fire or Surround being too heavy this will require a second day of installation as the Hearth will rest unlevel. The Inset, Fire & Surround are then installed and if necessary our installers will ‘Make Good’ ready for a decorator to finish professionally.
–
Hole in the Wall Installation
Step 1 – Identifying Chamber Size
If it’s possible to identify the chamber size while the fireplace is still in place we can be a lot more selective on which fire will fit. Rare cases the fire/fireplace may need to be taken out to understand chamber space.
Step 2 – Rip Out/Preparation
Once the fireplace has been ripped out we brick up the opening to create the right size opening to suit the fire. The while drying is too soft to install the fire, thus a second day is required for the installation.
Step 3 – Installation
At this stage the task is simply sliding the engine into place, connecting to the adjacent live gas feed and commissioning. Our fitters seal the gas fire to the wall and if necessary we ‘Make Good’ as best as possible. This process is the same for all Hole in the Wall fires elevated off the ground; glass fronted or open fronted.
–
Stove Installation
Step 1 – Your Fireplace
It’s always ideal for us to understand what you currently have. Whether it’s a full fireplace, outset gas heater or a ready open chamber. From here we can calculate how much needs to be removed to give a more accurate quote for what’s involved.
Step 2 – Rip Out/Preparation
Once the original fireplace has been taken out and the Chamber has been exposed we can take sizes for elements such as the Insert and Back Hearth. This usually requires an interval of approximately 2-3 weeks while the stone is being cut at our manufacturers.
Step 3 – Fireplace Installation
For some stoves the process can differ depending on their instruction manual however for the majority of Freestanding stoves the fireplace gets installed first and left to set.
Step 4 – Installation/Flue Lining
The installation of the Fireplace and Stove/Flue Lining are usually done on two to three separate days. This is mainly due to either the weight of the Fireplace Surround or the Stove itself. While the Hearth is resting if too much weight is put on top it will rest unlevel.
The good news is usually this can be done on consecutive days. Once the fireplace is all installed the
–
Making Good
‘Making Good’ is a terminology we use to describe the finishing touches to the fireplace, particularly focused around plastering. Once a Fireplace, a Stove or a Hole in the Wall Fire has been installed, commonly there is the necessity for decorating. The scale of this decorating depends on the project. We aim to make this decorating process as simple and easy as possible. Thus as part of our installation we offer to ‘Make Good’ the area of installation. Our installers are some of the best you will find in the fireplace industry, small plaster touch ups are certainly within the realm of possibility. Should a top skim plaster finish or a large area of plastering be required (The front face of a chimney breast for example) this will need to be organised with a professional top skim plasterer. Our services are exclusive to Plastering only; painting, wallpapering and skirting board are services to be left for a decorator.
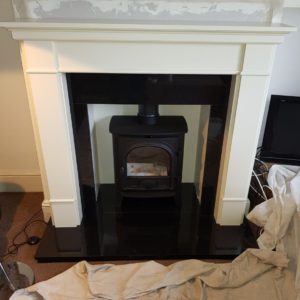
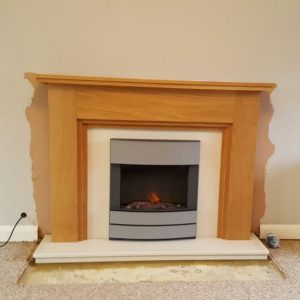
Please see below some examples of our ‘Make Good’ finishes in the various formats of fireplaces/fires;
–


